Where to Place Your Kitchen Beverage Station
Updated: 5 days ago
A great kitchen does more than handle dinner prep. It also supports the small routines that happen all day: making coffee before work, filling water bottles, pouring tea, mixing a drink, or setting out cocoa when guests come over. When those routines share space with cooking, unloading groceries, and cleaning, the kitchen can feel crowded fast.
That is why a beverage station deserves attention during the planning stage, not after the cabinets are installed. A well-designed drink zone keeps supplies together, reduces trips across the kitchen, and gives everyday appliances a proper home. It can be compact or generous, simple or fully built in. What matters most is that it fits the way the kitchen will actually be used.

Start with the role your beverage station needs to play
Before choosing tile, hardware, or appliances, define the job of the station. Some kitchens need a morning coffee setup. Others need a family-friendly drink hub with water, ice, cups, and snacks. Some homes benefit from a hosting zone where guests can serve themselves without stepping into the cooking area.
A Beverage station in kitchens should solve a real traffic problem. Think about what currently interrupts the flow of the room. Is the coffee maker taking up valuable prep space? Are glasses stored far from the refrigerator? Do guests stand in front of the range while looking for drinks? Those answers help shape the layout.
Common beverage station goals include:
Keeping coffee and tea supplies off the main counter
Creating a grab-and-go water and snack area
Giving guests a place to serve themselves
Housing wine, sparkling water, or mixers near glassware
Adding a second sink for rinsing cups or filling a kettle
Reducing morning congestion around the main refrigerator
The best location depends on the kitchen layout. A beverage station can sit on an unused wall, at the end of a cabinet run, near a pantry, inside a butler’s pantry, or along the edge of an island. If the station serves guests, placing it slightly outside the main cooking triangle often works well. That lets people get drinks while someone else cooks.
For daily coffee or tea, convenience matters more than display. The station should be close to water if possible, near the trash or compost for grounds and tea bags, and close to the breakfast area. If the space supports kids or teens, choose durable surfaces and easy-to-reach storage.

Plan the right mix of appliances and fixtures
The appliance plan sets the tone for the entire station. A small drink zone may only need a coffee maker and a drawer for supplies. A larger setup may include refrigeration, water, ice, a sink, and specialty equipment.
Start with what gets used every day, then add extras only if they earn their space.
Coffee and tea equipment
A coffee setup can range from a simple drip machine to a built-in espresso system. The key is allowing enough counter clearance to use the machine comfortably. Top-loading coffee makers need space above for water and grounds. Espresso machines often need room beside them for a grinder, tamper, knock box, and milk frothing pitcher.
A good Kitchen Coffee Bar also needs storage that matches the routine. Mugs, filters, beans, tea bags, sweeteners, stirrers, and spoons should all live within arm’s reach. If several people use the station each morning, leave enough landing space for more than one cup.
For tea drinkers, include a spot for an electric kettle, loose-leaf tea containers, infusers, honey, and small plates. If the station has plumbing, a small sink or filtered water faucet can make tea and coffee prep much easier.


Refrigeration and cold drinks
An undercounter beverage refrigerator can free up space in the main refrigerator, especially in busy households. It works well for sparkling water, juice boxes, canned drinks, mixers, and chilled wine.
Before adding one, think about door swing and noise. The door should not block a walkway or hit nearby cabinets. Ventilation matters too. Built-in units need the right clearance according to the manufacturer’s instructions, so plan this early with the cabinet layout.
If a beverage refrigerator is too much, a pullout drawer for shelf-stable drinks may be enough. The best choice is the one that supports actual habits, not an appliance list from a dream kitchen photo.

24'' Beverage Refrigerator, 180 Can Beverage Fridge Under Counter
Sink, faucet, and water features
A small sink can make a beverage station far more useful. It offers a place to rinse mugs, fill coffee machines, wash fruit, or dump leftover drinks. If the station is near existing plumbing, adding a sink may be practical. If not, the added cost and routing may outweigh the benefit.
Water features to consider include:
Filtered water faucet
Instant hot water dispenser
Small prep sink
Ice maker
Pot filler style faucet for coffee and tea equipment
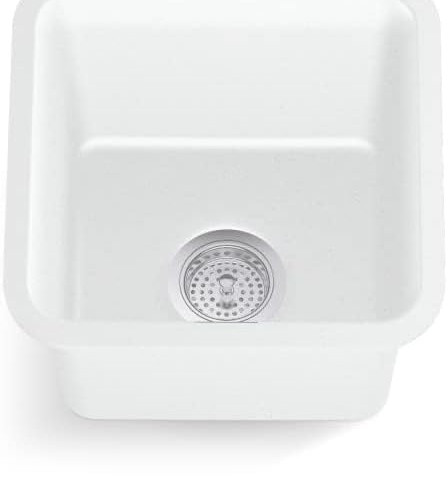


Each feature adds convenience, but also cost, maintenance, and planning requirements. Choose based on daily use. If filtered water is a priority, a dedicated faucet can be a smart addition. If ice is only needed during parties, an ice bucket may be simpler than a built-in ice maker.

Design storage that keeps the counter usable
A beverage station can become cluttered. Small items pile up quickly: pods, filters, tea tins, straws, napkins, corkscrews, bottle openers, sweeteners, coasters, and travel lids. The goal is to keep the station easy to use without turning the counter into a supply shelf.
Everyday items belong in the most accessible spots. Mugs can go on an open shelf, in an upper cabinet, or in a wide drawer with pegs. Coffee and tea supplies fit well in shallow drawers, tray dividers, or pullouts. Less-used party items can live higher up or in deeper storage.
Here is a simple way to organize the pieces:
Item | Best storage location | Planning note |
Mugs and everyday glasses | Upper cabinet, open shelf, or drawer | Keep close to the machine or refrigerator |
Coffee, tea, and filters | Shallow drawer or pullout | Use dividers to prevent clutter |
Sweeteners and stirrers | Small drawer or tray | Keep near the cup landing area |
Wine glasses and barware | Glass-front cabinet or closed cabinet | Place away from kids’ reach if needed |
Bottles and mixers | Beverage refrigerator or tall cabinet | Check bottle height before ordering shelves |
Cleaning supplies | Sink base or nearby pullout | Separate from food and drink items |
Closed storage creates a cleaner look. Open shelving makes the station feel inviting and keeps favorite items easy to grab. A mix of both often works best. Use open shelves for attractive, frequently used pieces, then hide the less attractive supplies behind doors.
Do not forget trash. Coffee grounds, tea bags, bottle caps, packets, and citrus peels need somewhere to go. If space allows, a narrow pullout trash bin near the station is extremely useful. At minimum, keep the station close enough to the main trash area that cleanup feels natural.
Choose surfaces, lighting, and outlets with daily use in mind
Quartz, porcelain, sealed stone, and solid surface counters are common choices because they are easy to wipe down. Butcher block can look warm and inviting, but it needs care around water and staining. Tile can add character, though grout lines may need more cleaning near coffee and wine.
The backsplash should also support cleanup. Coffee splashes and water spots are easier to manage on smooth tile, slab material, or washable surfaces. If the beverage zone includes a sink, choose materials that tolerate moisture well.
Lighting is another detail that changes how the station feels. Under-cabinet lighting makes early mornings easier and helps the station feel intentional. A wall sconce, small pendant, or interior cabinet lighting can add warmth, especially if the station sits in a pantry or alcove.
Electrical planning is one of the most important steps. Beverage stations often need more outlets than expected. Coffee makers, grinders, kettles, frothers, blenders, wine chillers, and charging water bottles can add up.
Plan outlets for:
Coffee maker or espresso machine
Grinder
Electric kettle
Milk frother
Blender or small appliance
Beverage refrigerator
Undercabinet lighting
Future appliances
Place outlets where they are useful but not visually distracting. Under-cabinet plug strips, backsplash outlets, and outlets inside appliance garages can all work, depending on code requirements and the design. Always coordinate electrical details with a licensed professional.
Ventilation may also matter. Coffee makers and kettles release steam. If the station sits under cabinets, leave enough clearance and use durable materials above the appliance area. Appliance garages look tidy, but heat and moisture need a way to escape. Follow appliance instructions before enclosing anything.

Make the station fit the kitchen layout
A beverage station should feel like part of the kitchen, both visually and functionally. It can match the main cabinets for a seamless look, or use a slightly different finish to create a furniture-like feature. The right choice depends on the size of the kitchen and the overall design.
In a smaller kitchen, matching the cabinetry usually keeps the room calm. A compact station can share a counter run with a pantry cabinet or sit near the refrigerator. In an open kitchen, a contrasting cabinet color can help define the drink zone without adding walls.
Pay attention to walking paths. A beverage refrigerator door, dishwasher door, or cabinet pullout should not block the main aisle. If more than one person will use the kitchen at the same time, the station needs breathing room.
Good locations often include:
The end of a cabinet run near the dining area
A wall between the kitchen and breakfast nook
A butler’s pantry or walk-through pantry
A recessed niche near the main refrigerator
A dry bar area off the main cooking zone
One side of a large island, if plumbing and power allow
The relationship to the main refrigerator matters. If the beverage station has its own fridge, it can sit farther from the main one. If it relies on the main fridge for milk, cream, juice, or ice, keep the distance short. A beautiful coffee area across the room may look nice but feel inconvenient every morning.
For households that entertain often, the best placement is usually near the edge of the kitchen. Guests can grab drinks without crossing the cooking zone. This reduces crowding and makes the kitchen easier to manage during meals and gatherings.
Add personal details without overfilling the space
Once the practical pieces are in place, style the station with restraint. A beverage station should feel welcoming, but it still needs open counter space. The best details are useful, beautiful, or both.
A tray can group small items like sugar, stirrers, and bottles. A small bowl can hold citrus. A framed print, plant, or lamp can soften the area if space allows. Glass jars can make coffee beans, tea bags, or cocoa look tidy, but only if they suit the routine. If no one wants to refill jars, closed containers may be better.
Personal touches that still serve a purpose include:
A favorite mug shelf
A drawer insert for tea packets
A small tray for cocktail tools
A carafe for filtered water
A divided organizer for sweeteners
A compact basket for napkins
A cookbook stand for drink recipes
Seasonal items can rotate in without taking over. Hot cocoa supplies, summer drink mixers, or holiday mugs can live in a bin and come out when needed. That keeps the permanent setup simple.

The best beverage stations are planned around habits
A beverage needs the right location, have the right storage, enough outlets, durable surfaces, and a clear purpose. When those pieces come together, daily routines feel easier and the kitchen stays more organized.
Start with the drinks made most often. Then map the supplies, appliances, water needs, and cleaning steps around that routine. The finished station should make sense on a busy morning, during a quiet afternoon, and when guests are gathered nearby.


Comments